


My Halloween dream for many years has been unlimited fog for my front yard graveyard haunt. I usually set up a fence along the sidewalk and have a bunch of tombstones and other scary Halloween props in the front yard. I’ve run 3-4 foggers on individual timers but they just couldn’t keep up and no matter how hard I tried, the timers wouldn’t synch up. So I’d have a lot of fog and then 2 minutes later have nothing. I needed a complete system for continuous fog.
Tomb Fog Chiller
To help your fog stay around you need a fog chiller to cool the fog after it leaves the fog machine. I’d done trash can fog chillers in the past and they work ok but then you have a big black trashcan in your haunt that you have to incorporate or hide somehow.
This tomb fog chiller has 3 foggers connected to an Arduino micro-controller and controlled by relays. This method allows one fogger to fire off for a full 30 seconds, then the next, then the next – so I can have (nearly) continuous fog.
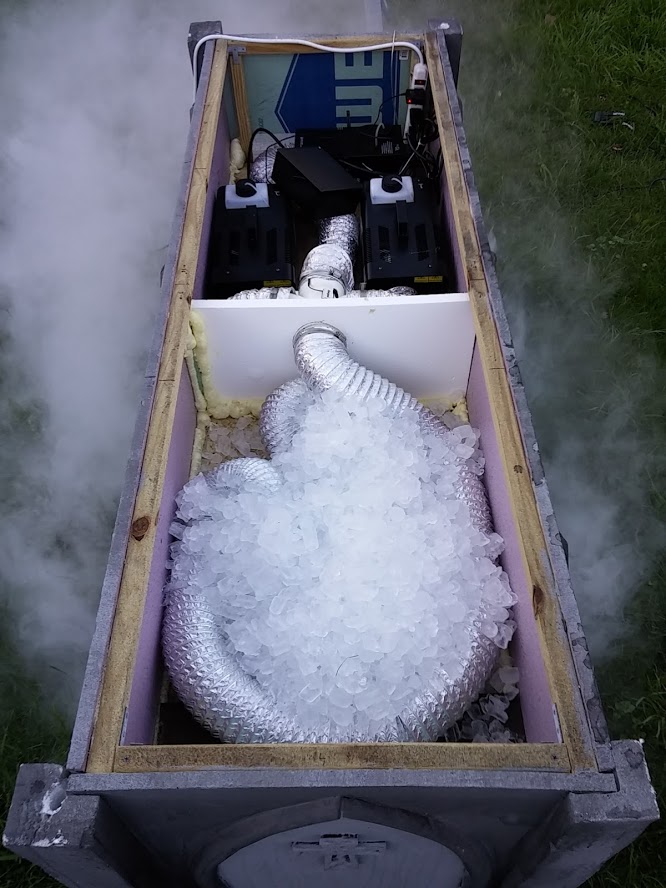
The idea was that foggers on one end would all feed into a tube that carried the fog into the “cooling side” where it snaked around, cooled under 5-6 bags of ice, and was then dumped into the bottom chamber to be released at ground level.
Building a Fog Chiller
I’d done foam sculpting before with some tombstones and had good success with foam board. This project, however, was going to require a wooden frame as a skeleton (as it were). Having no plans to work from I set out to construct this box.

Dimensions are 75″ long by 22″ wide by 36″ tall
The box is cut in half twice: longways, to form a top & bottom – the top is where the fog machines, electronics and ice sit. The bottom allows the fog to emanate from all sides at once. The top section is also cut in half to separate the ice from the electronics. Sorry, I don’t have the foggers in the photo below.
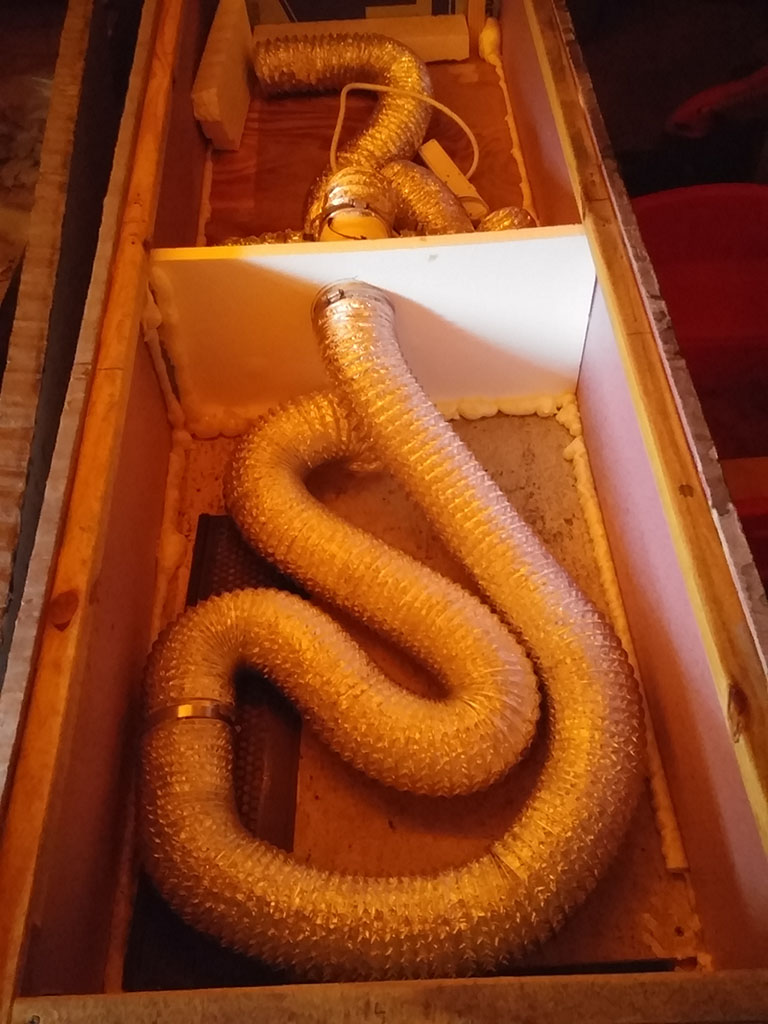
Fog comes from the far side, through the wall, snakes around this end under ice and then out the bottom.
The internal wall is just a piece of super dense foam I got in some packaging. It’s much harder than your typical styrofoam (not sure why & I don’t remember where I got it). Cut to allow 3 inch PVC All-Hub Double Sanitary Tee joint. Three foggers on the left alternately pump into the iced chamber on the right.
3 foggers feeding into the ice chamber
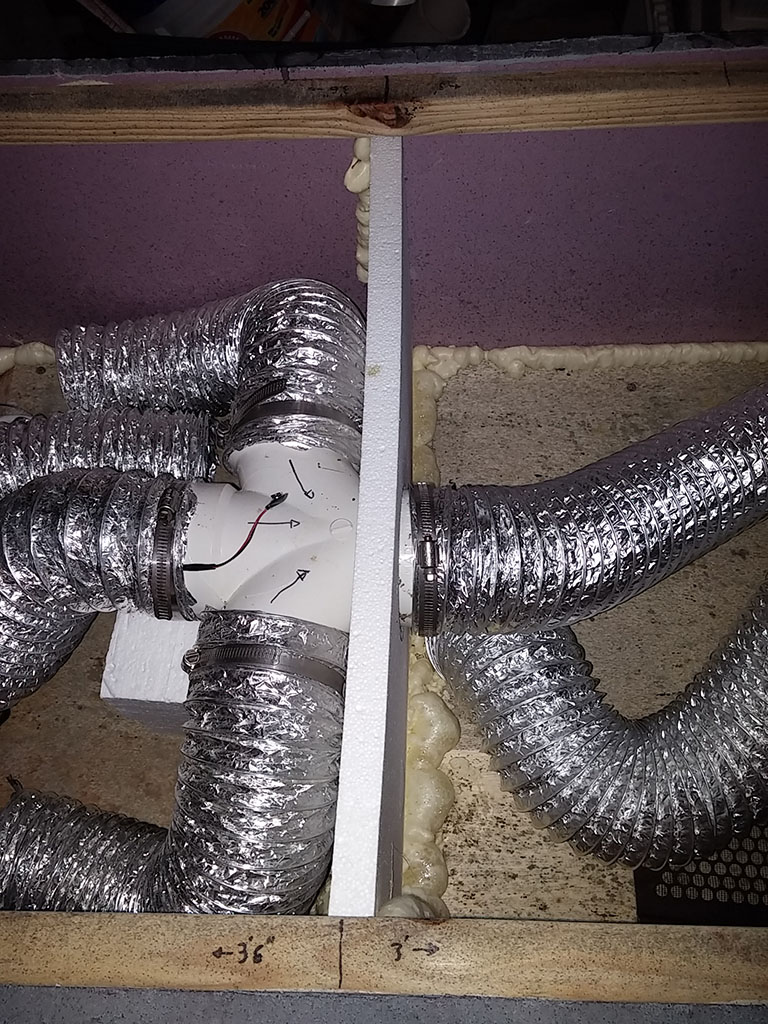
I should point out here that you can see a 9V battery plug on the center part of the junction. This powers a small PC fan that pushes the fog in the right direction through the ice.
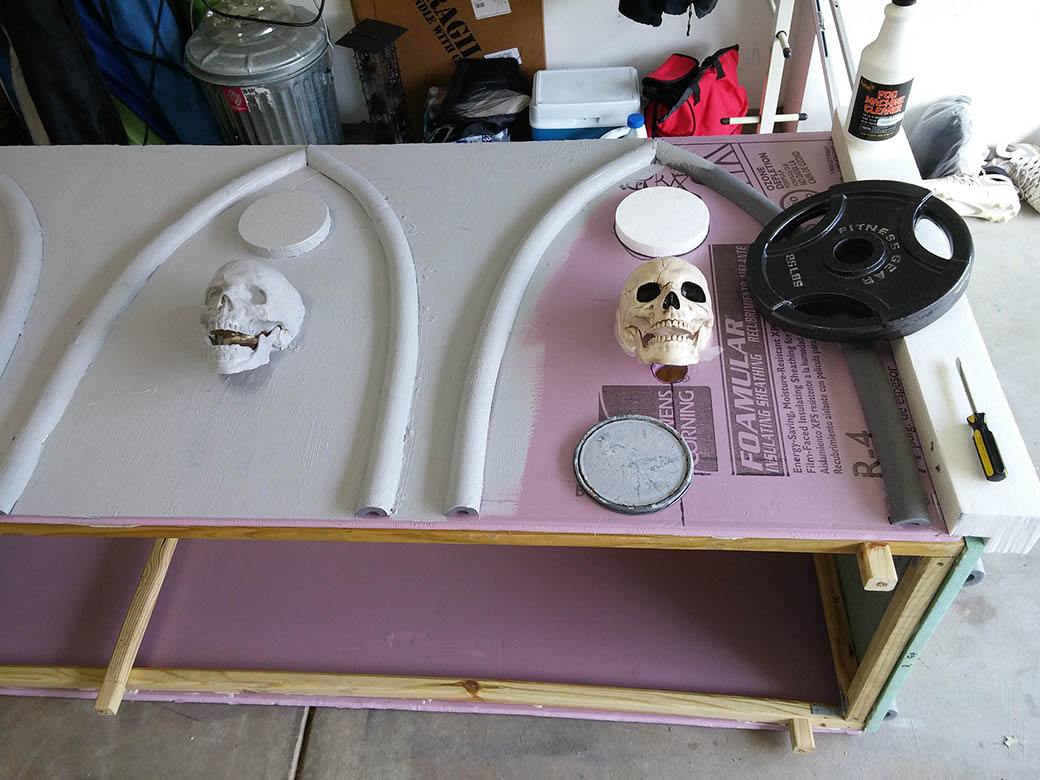
The crypt had to sit 3 inches off the ground in order to let out the fog from the bottom. I probably should have built that into the framework but since I didn’t know how tall it needed to be, I added the feet later.
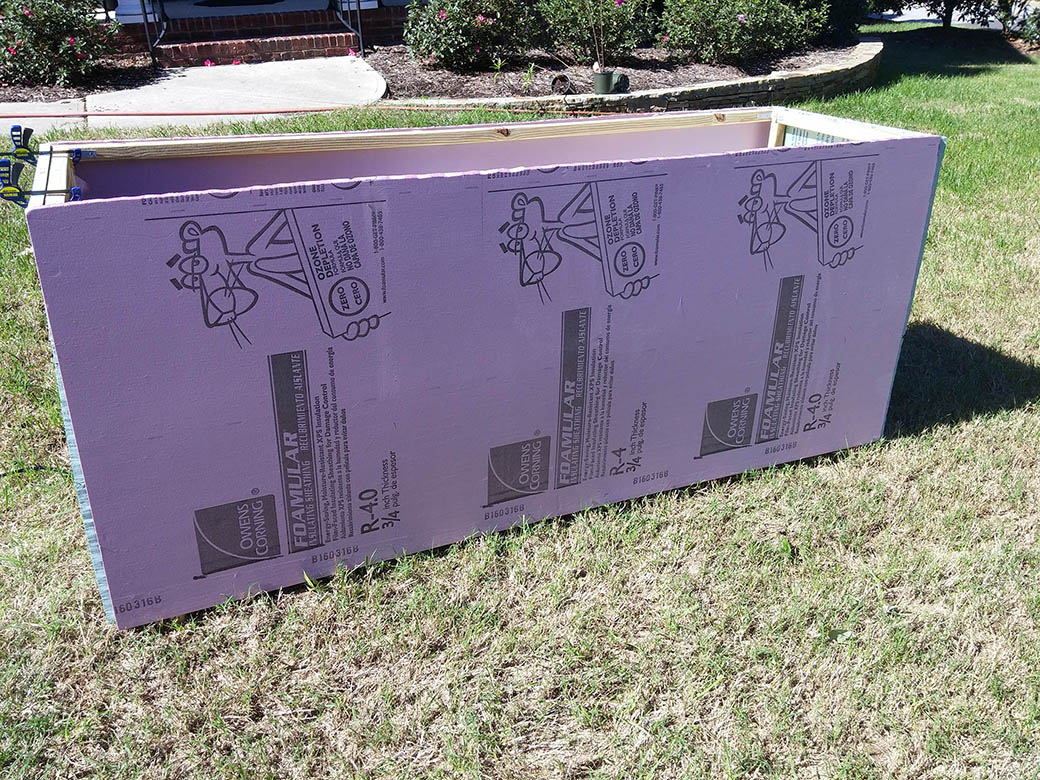
I used liquid nails to attach pink insulation foam to the frame. That worked out pretty well and everything held in place nicely. Pink Panther… not so scary.
Now it was time to decorate it. I found three skulls for $10 each and cut the back half of the skull off so they could be mounted flat. The arches are pipe insulation split lengthwise (like a hot dog bun). It was trickier than I thought to get the three arches to have the same curve to them. I had to redo the middle one a few times.
I found some foam discs at the craft store that I used to create some raised Gothic rosettes. Also two wooden carved crosses to add to the look. Coloring didn’t matter as they were all going to get a coat of paint.

Holes to be cut behind the mouths for fog to escape
Next up was to paint. I use a mixture of Dry-Loc and black paint to make a dark gray, hard coating for the foam. Works great on my tombstones. I use about a half cup of black paint in a full can of white Dry-Loc. You can adjust accordingly for your color needs. Buy a paint mixer that attaches to your cordless drill. Thank me later.
Holes behind the skulls’ mouths to let fog escape.
Final stage was weathering. For some reason, I love this part. If you don’t, give me a call and I’ll come do yours. You start off with something clean and new looking and then get to trash it! What’s not to love?
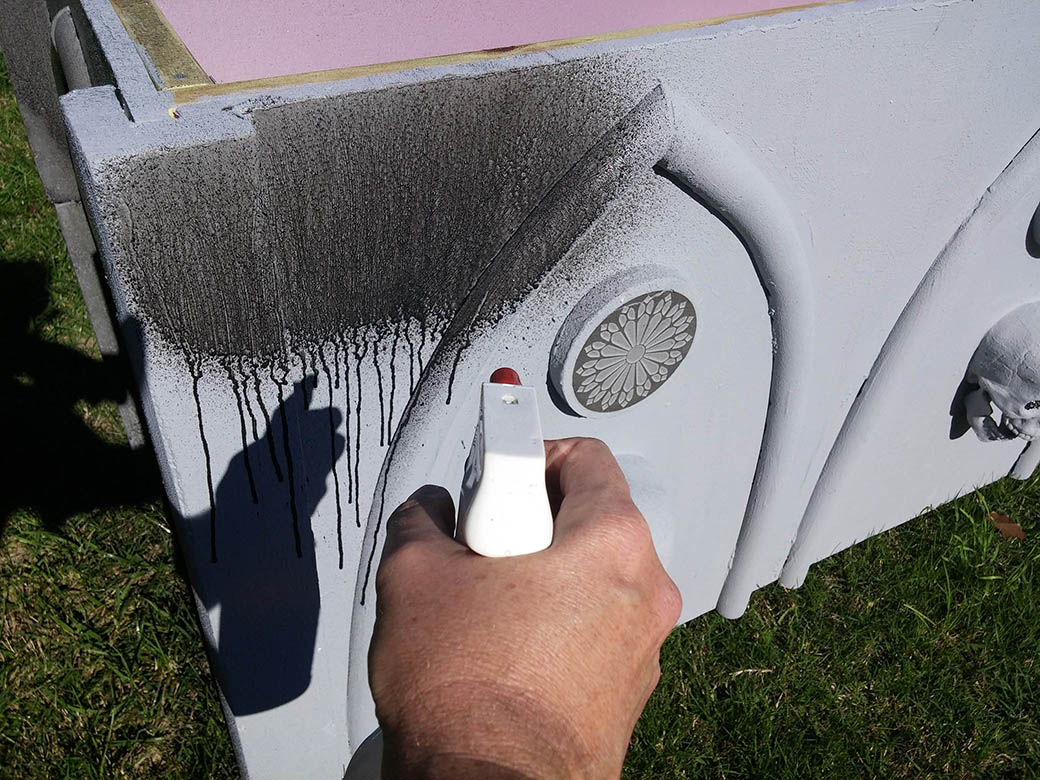
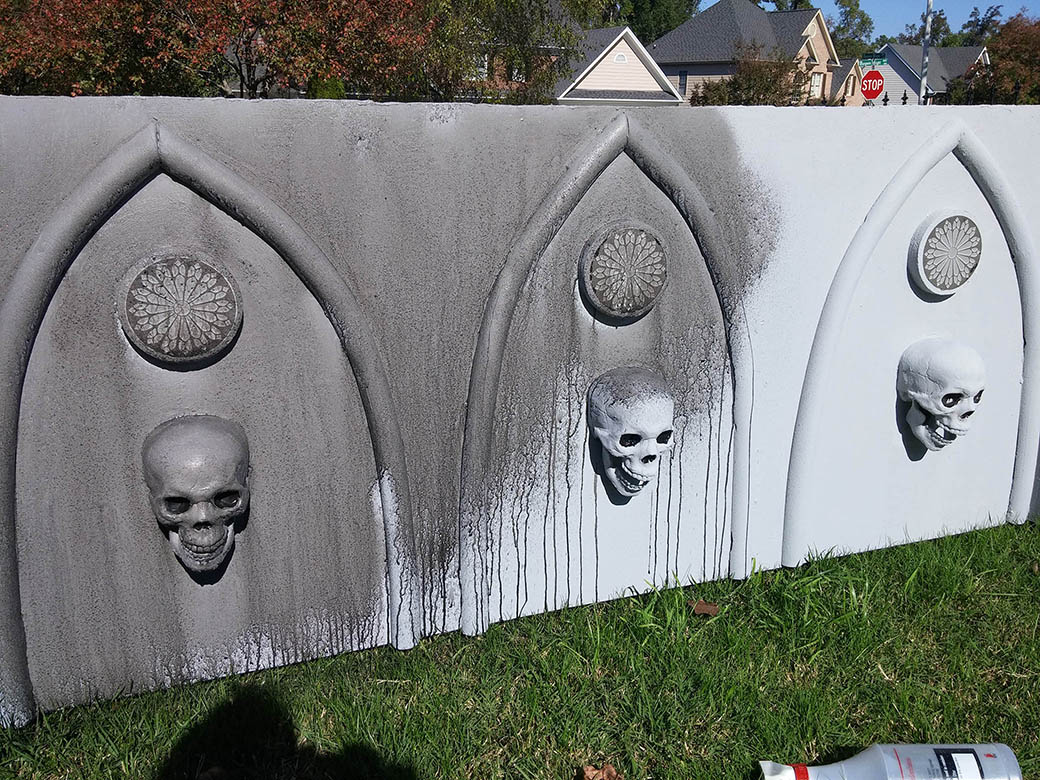
I fill a spray bottle with water and about a table spoon of black paint. Then just spray it liberally all over the whole thing. Usually takes 2 – 3 coats and you can focus on different areas to simulate where the natural weathering would take place. Once it dries it’s much lighter in color. The first coat can show you where to focus your next coats.
That’s about it for this step. Stay tuned for the next post where I outline running 3 foggers on a timer with the arduino controller.
This build was inspired by the great work of Donnie Lizenbee over at HalloweenForum.com
Crypt Fog Chiller In Action