Easy to Build Crystal Skull Wall Light

I saw this idea on Facebook (of all places) and had to give it a shot.  I’d kept my bottle of Crystal Head Vodka for a few years and, being a Halloween nut, I knew I was going to do something cool with  it but never got around to figuring out exactly what.  When I saw this idea I instantly knew where it was going in our house – in the creepy stairwell to the theater room.

It was amazingly simple to build.  Of course, here’s the part where I tell you to follow manufacturer’s instructions and to never work on electrical outlets in your house without first turning off the power.  There are tons of references online for replacing a lighting receptacle safely so you should familiarize yourself with the process.

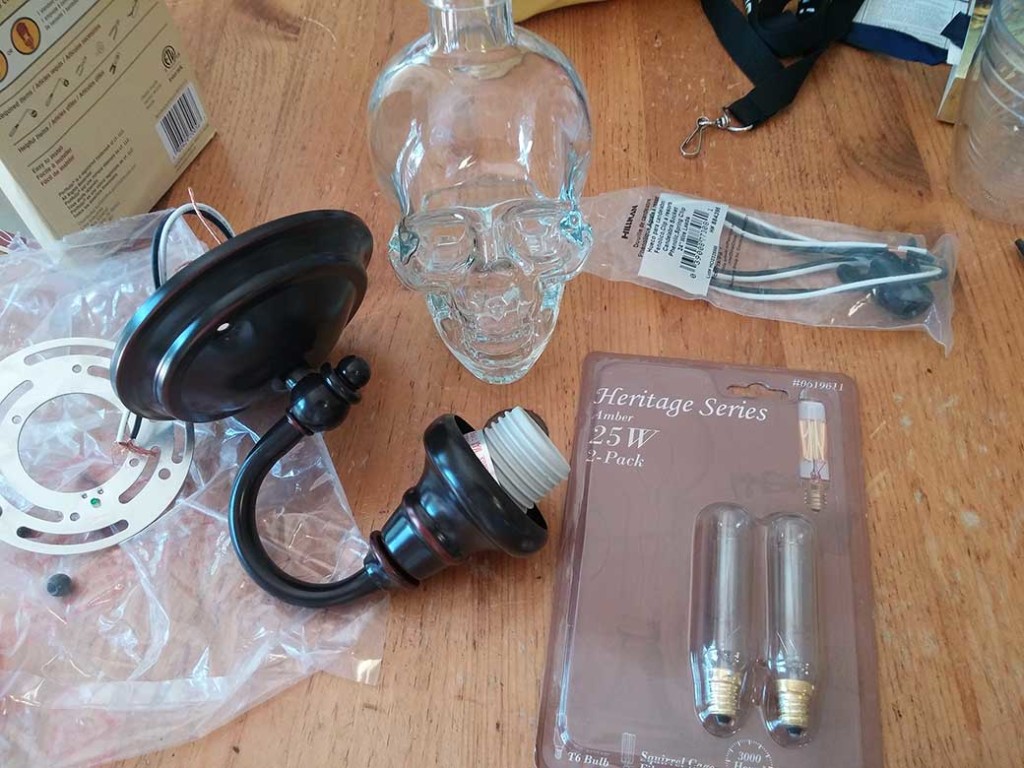
All of the pieces.

All of the pieces.

Getting the parts list together was as easy as hitting my local home improvement store.  I found:

  • a Portfolio brand wall sconce – shade was sold separately which was fine because I had my…
  • Crystal Head vodka bottle (enjoy the vodka on a different day than your build and be sure it’s washed and dried)
  • a Hillman candelabra socket with 24″ wire leads and a spring clip
  • a candelabra sized light bulb – can’t be more than 1 inch wide and 4 inches tall. Pictured are 25W bulbs but I found this 40W warm white LED bulb on Amazon and went with that instead.
  • Three 2 inch #6 machine screws for attaching the skull to the fixture – length can vary depending on your light fixture size. I got 2 inch and cut them down a little.
  • Tools like pliers, screwdrivers and wire-strippers

That’s it! You’re ready to go.  I think the whole lot cost me around $30 not including the Crystal Head Vodka.

Step 1
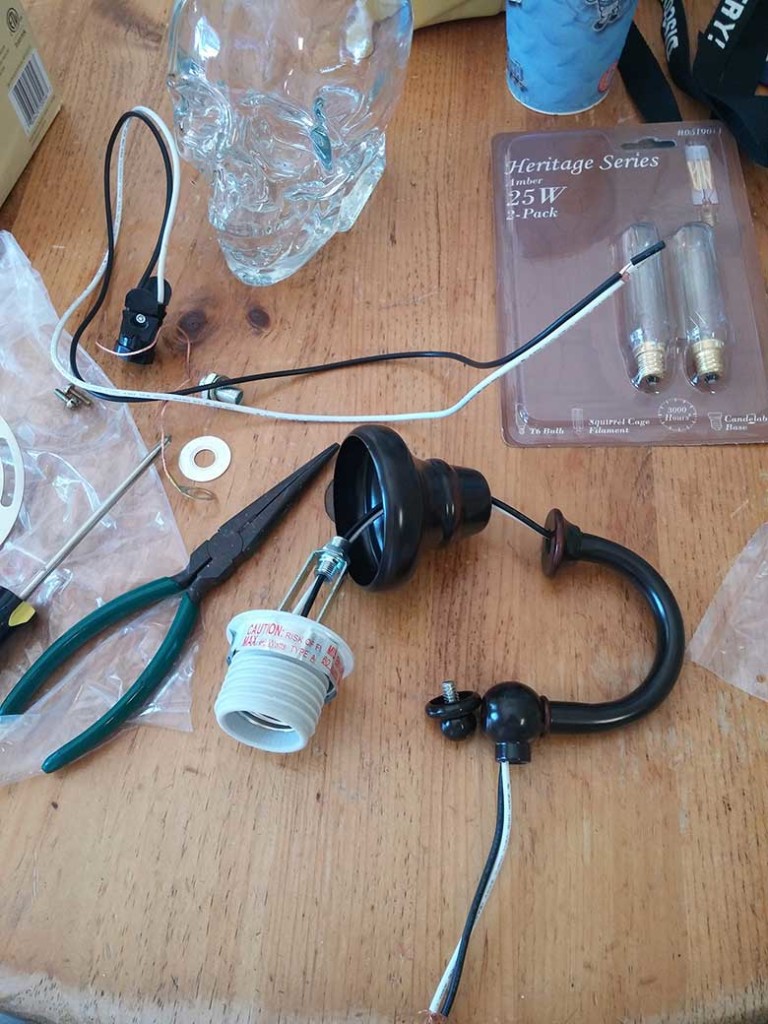
 

Remove the existing bulb socket. It’s too large for the Crystal Head bottle. That’s why we needed the candelabra socket. This one just took a few screws to remove and I pulled it right out.

Step 2
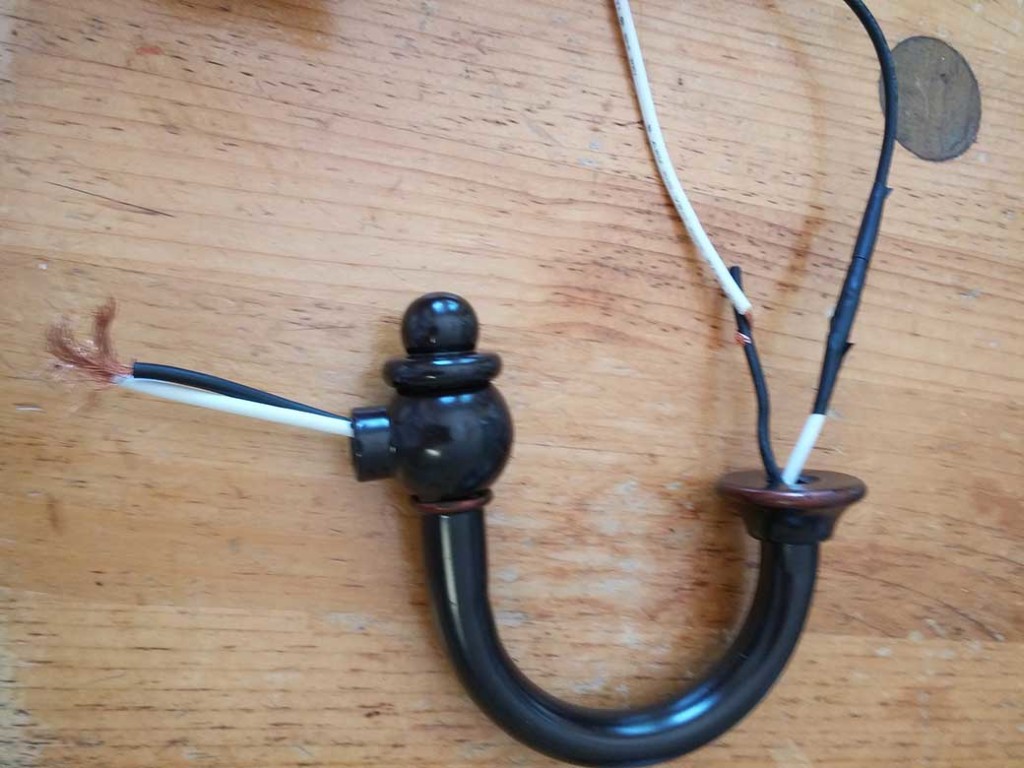
 

You may be able to skip this step depending on the fixture you choose. I was worried about threading my new wires through this little neck so I clipped off the socket and attached the old white and black to the new white and black and used that to pull my new socket's wires through.

You may be able to skip this step depending on the fixture you choose. I was worried about threading my new wires through this little neck so I clipped off the socket and attached the old wires to the new and used them to pull my new socket’s wires through.

Step 3
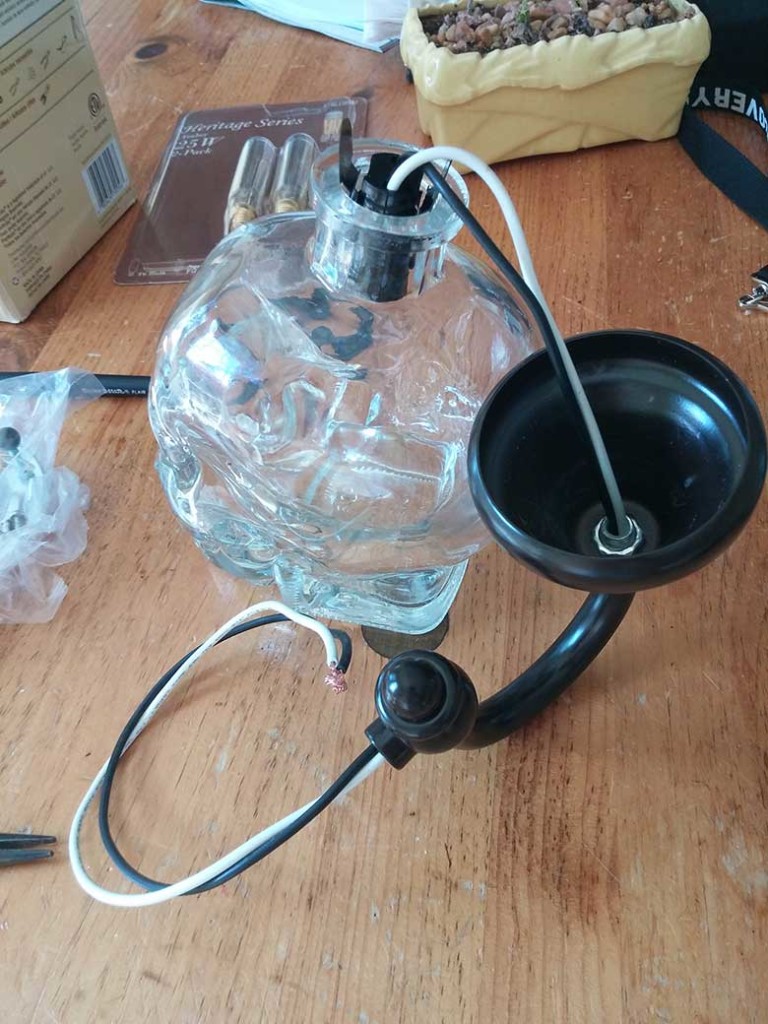
 

There you have it. The new socket

There you have it. The new socket clips in and holds the bulb steady. This does NOT support any of the weight of the glass skull. That happens in the next step. The spring clips are just enough to hold the bulb in place.

Step 4
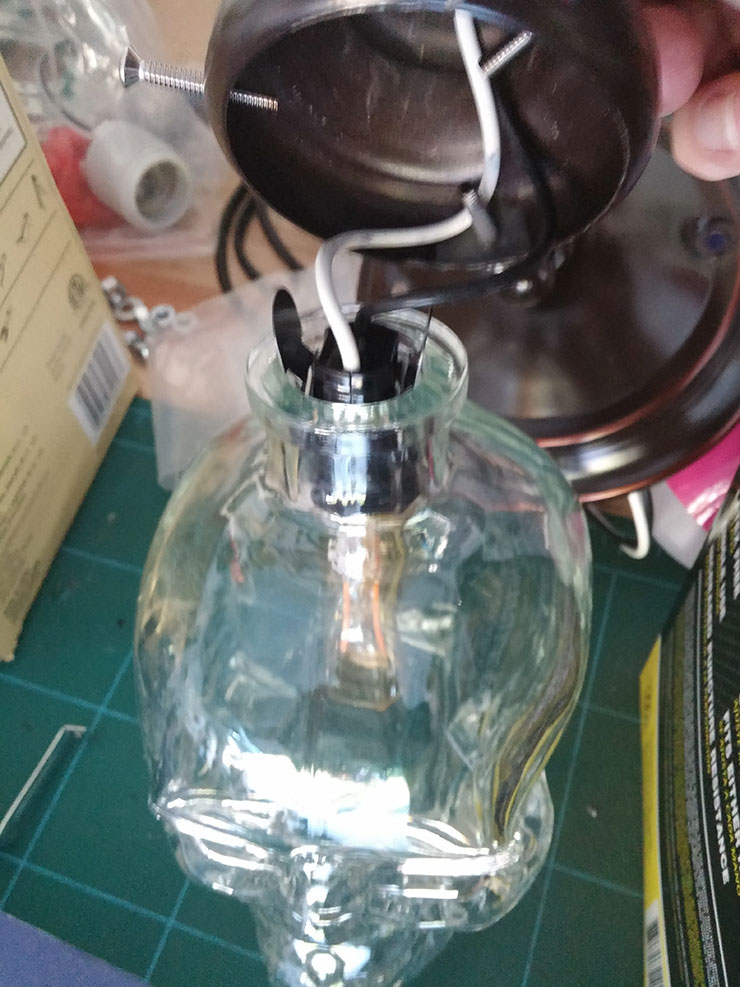
I figured the easiest way to attach the crystal skull was similar to the way most globes are attached to ceiling fans - via 3-4 screws that come together to "pinch" the globe in place.  I didn't want to try to permanently attach the skull becasue I'd need to replace the bulb every so often.  This fixture didn't have those screws so I drilled 3 holes and put my own machine screws in.

I figured the easiest way to attach the crystal skull was similar to the way most globes are attached to ceiling fans – via 3-4 screws that come together to “pinch” the globe in place. I didn’t want to try to permanently attach the skull becasue I’d need to replace the bulb every so often. This fixture didn’t have those screws so I drilled 3 holes and put my own machine screws in.

Step 5
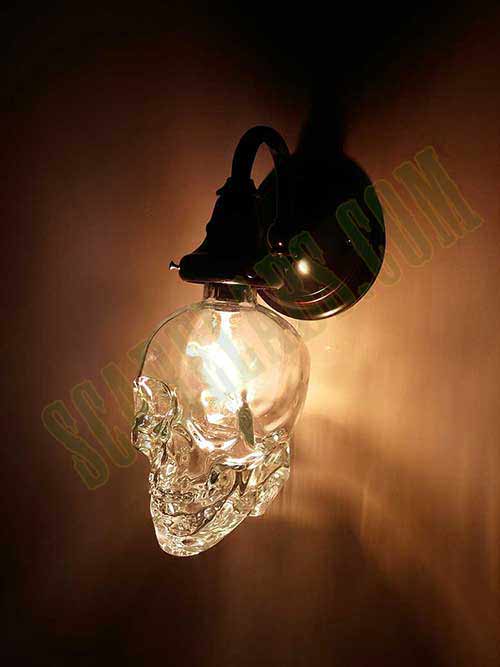
Mount the fixture according to  manufacturer's instructions.  Flip the light on and congratulate yourself on an amazing light fixture.

Mount the fixture according to manufacturer’s instructions.
Flip the light on and congratulate yourself on an amazing light fixture.


I will probably go back and do some more “weathering” to the fixture to make it look rusty and old, but I was too excited to get it mounted and see how it turned out.  Overall I’m thrilled with the way it looks in my house.

Choosing a Projector for Home Projection Mapping

How Do I Find the Right Projector for Projection Mapping?

When looking for a projector for use in home projection mapping, there is no one-size-fits-all solution.  I wish I could just tell you to buy the Sony ABC45J or Panasonic MX4 projector and you’d be ready to go (BTW both are made up model numbers).

The problem is you’re working in a very un-ideal environment. Outdoor projection onto a surface that wasn’t meant for projection is going to bring its own unique set of challenges for each different house. My house has a brick facade and is one house down from a street light. Your house might be white siding on the front and be in complete darkness. We’d have different success with different projectors.  What I’m hoping to offer here is some general things to look for when choosing a projector.

Get all the lumens!

Get all the lumens!

Lumens

Regardless of our differing houses, the one thing you can hang your hat on when is comes to video mapping your own house is this: the more light the better. Since we do face this problem of different situations with our house colors, ambient light, differing throw distances, etc. we need to dump every photon we can on our house to try to overcome these problems.  You won’t want to go below 2000 lumens and 3000+ would be better.

The professional displays you see on YouTube are using 10,000 and 20,000 lumen projectors.  In many cases they have to have that because they’re projecting onto three or four (or ten or twenty) story buildings. So hopefully we can benefit from our smaller scale.

The best thing to do would be to test out a few different projectors  on your house. Borrow from your workplace or a friend and see what it does.

Contrast Ratio

Along with lumens you’ll see contrast ratio listed. They’ll be big numbers too… 20,000:1 or even 50,000:1.  This leaves you with the question, “which is more important?” when comparing projectors.  If you’re looking at one projector with 3500 lumens and 5,000:1 contrast ratio and another projector with 2700 lumens and 50,000:1 ratio – which do you choose?

The short answer is this: stick with lumens. Contrast ratio can differ between manufacturers and technology types (auto iris, color wheel, etc.). Ultimately its the difference  between your blackest black and whitest white.  This hurdle won’t be your biggest when trying to project outdoors.  You’re not going to be watching the Avatar Blu-Ray on the front of your house and trying to discern the colors of the bioluminescent plants in the forest.   You don’t want to ignore contrast though. Some older projectors might offer only 500:1 and you might be left with a washed out image.

Hardware Costs

A huge factor in buying a used projector is the cost of replacement bulbs.  These can be anywhere from $80 to over $300 for a single bulb.  Always check the cost of replacement bulbs when shopping for a used projector.

Building a solid projector platform

Your projector platform is almost as important as your projector. It needs to be sturdy. Even a small movement from the wind at the projector will be magnified in the projection.

You want your projector to be easy to set up and sturdy so someone doesn’t knock it over while viewing your show.  Consider a 2×2 foot piece of plywood with tripod like legs and a ceiling mount that hangs underneath. This will allow for fine tuning with a sturdy and adjustable set of legs.  I tried 1″ PVC pipe as the legs in a setup like this but they proved too wobbly.  Go for at least 1.5″ or 2″ if you try this route.

You could build your own enclosure too. This year I’m aiming for that.  I’ve got a cemetery fence that runs along the front yard.  I’m building two columns to hold a gate.  The projector will be housed in one of the columns.  This way I can make it (mostly) weather proof too.