


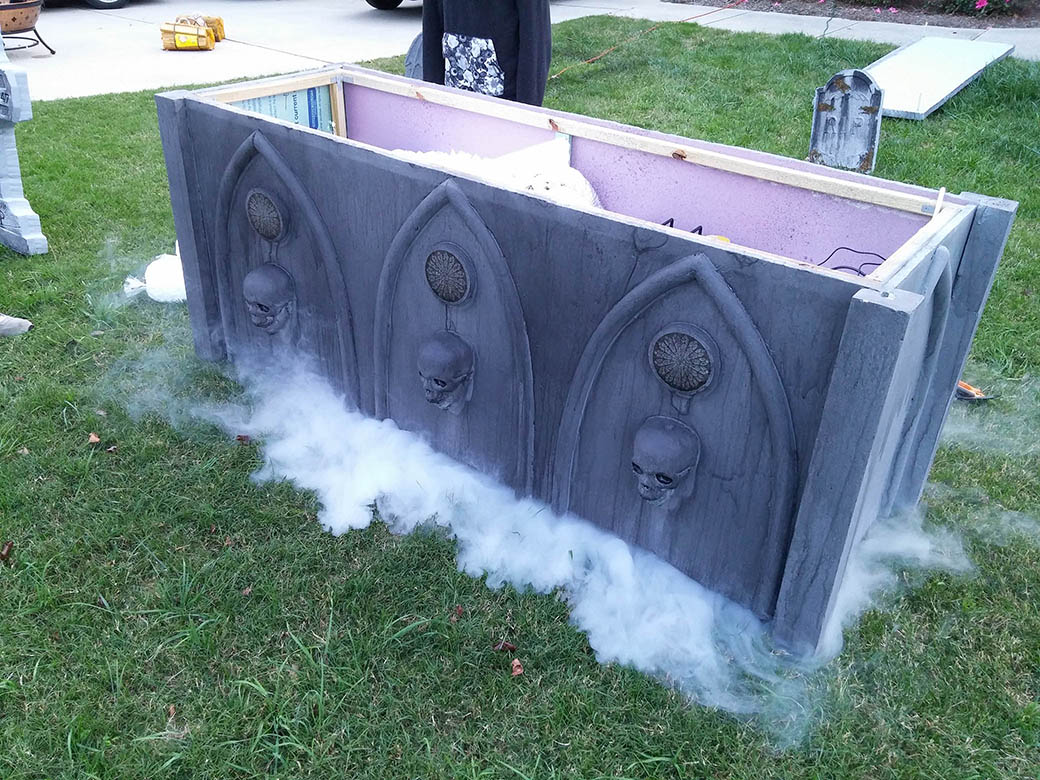
Controlling 3 foggers at once was a challenge I was excited to take on. I’ve always wanted the have continuous fog in my yard haunt. This gets me as close as I can without buying one of those $700 foggers – plus I get a nice big prop out of it!
Controlling A Fog Machine with an Arduino
Don’t skip over this because you think Arduino is too difficult for you to learn. I’ll give you my scripts that you can use – or use as a guide to set your own up. There’s tons of Arduino help out there if you need it. We’re basically doing an on, off, on, off rotation – so nothing too complicated.
DISCLAIMER: I am NOT an electrician. I am a hobbyist who built something after watching a lot of videos and doing some research. After reading this, do your own research and do not proceed unless you are following all of the recommended safety procedures.
The plug-in controller that comes with the fog machine is basically just a button that you press when you want fog. We’re doing the same thing (pushing a button) but via a relay switch.
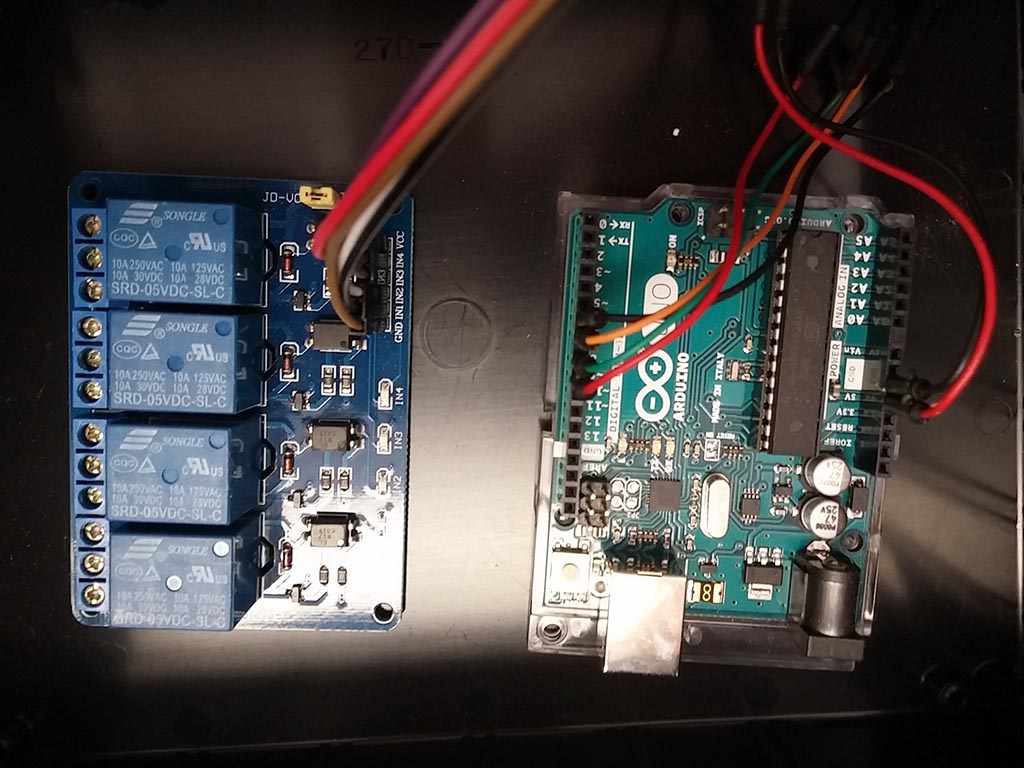
Relays on the left, Arduino Uno on the right.
Fog Machines Controlled by Relays
I’d never used a relay before this project. They’re really quite simple. They’re basically a switch that you can control via a computer program running on the Arduino. When the arduino wants to close the circuit on a relay it sends a signal to the relay and it closes – making the connection – basically like pressing the button on the fog machine controller. Find out more about controlling a relay module with arduino.
The less expensive 700 – 2000 watt fog machines need about 3 minutes to cycle through from one burst to the next. This waiting cuts into my need for continuous fog.
With an Arduino you can basically have 3 foggers on a 30 second interval that loops indefinitely (or at least until you run our of fog juice). The arduino code is basically this:
- Turn on fogger 1
- Wait 30 sec
- Turn off fogger 1
- Wait 30 sec
- Turn on fogger 2
- Wait 30 sec
- Turn off fogger 2
- Wait 30 sec
- Turn on fogger 3
- Wait 30 sec
- Turn off fogger 3
- Wait 40 sec (I gave it 10 sec more padding in here to allow the foggers a little more “off time” to recoup.)
- Repeat
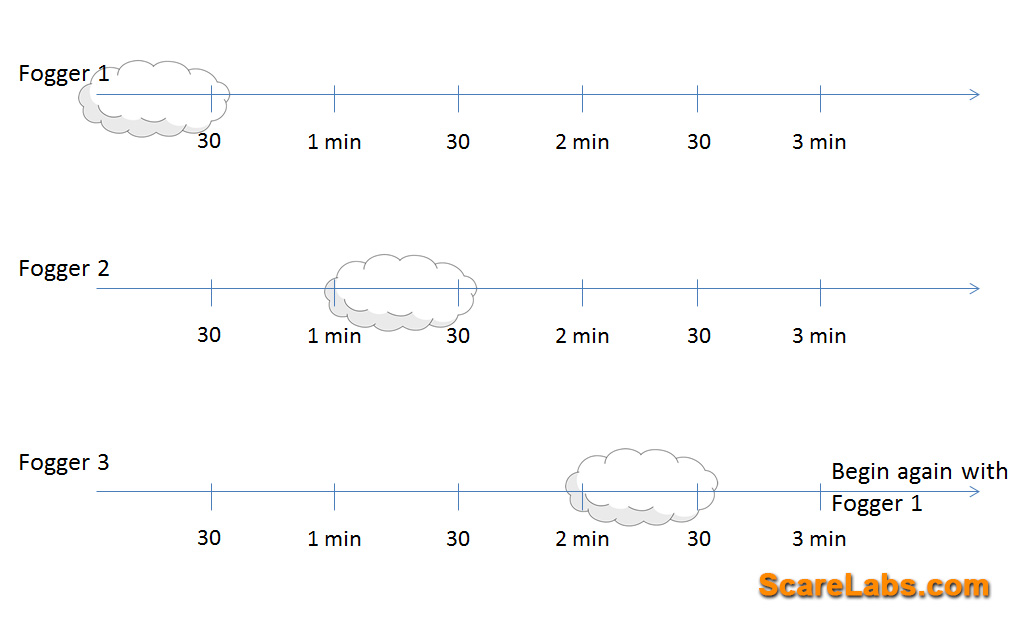
A quick diagram showing fog for 30 sec, all off for 30 sec, fog for 30 sec, all off again. Repeat.
Hooking Up A Fogger to a Relay
Last year I did a quick & dirty version of this with my electronics in a tupperware container and all wires hardwired right into the relays. This year I tried to make it a little more elegant and allow for 1/8” 3.5mm Headphone Jack mono plugs to connect the foggers to the controller box.
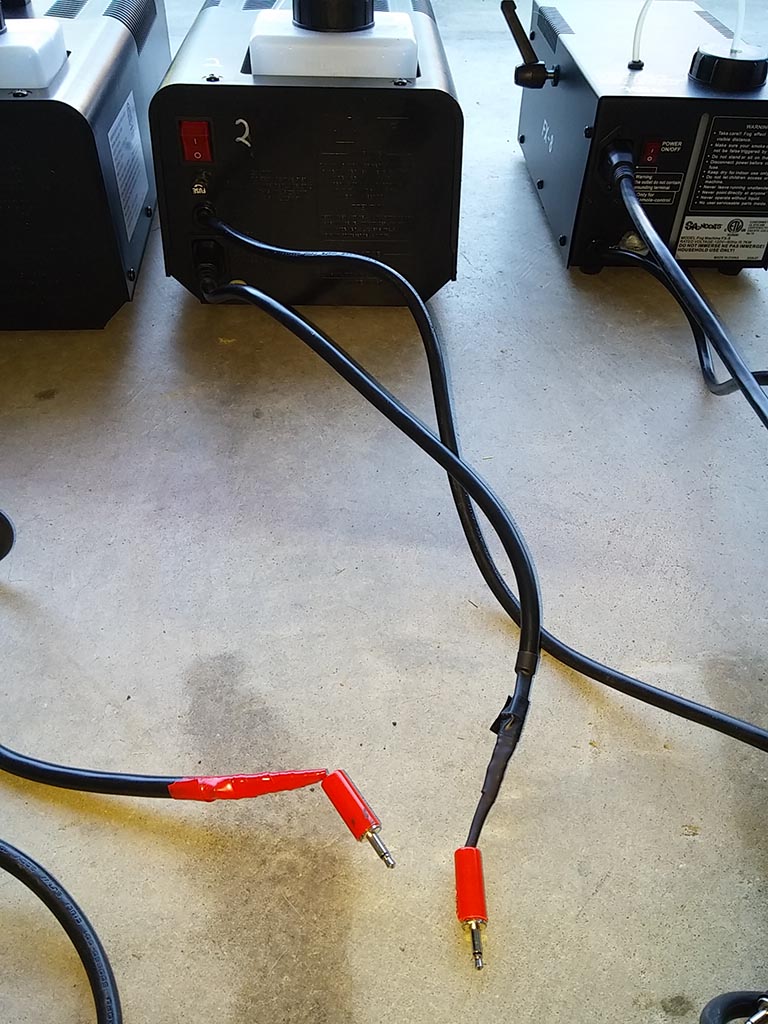
Cables hacked to headphone jacks. They actually have heatshrink tubing under the electrical tape, so they’re not as flimsy as they look.
My foggers’ control boxes connect with a 3 prong plug that is also commonly used as a PC power cord. I just cut off the other end and found the 2 wires that when connected, caused the fogger to start. I used a multimeter to see which wires to use. WARNING you can get shocked if you don’t know what you’re doing. Watch some videos to learn how to use a multimiter to find the correct wires.
These plugs then plug into ports on my controller box. They are basically a headphone jack with each wire soldered to each side of the plug. This carries the signal from the relay to the fog machine control port. Its the same as touching two bare wires together to make the connection but it’s a lot cleaner and easier to set up this way.
The relay controller board takes input from the arduino and closes each relay when told to. The relay boards can be found on any electronics site and even Amazon.
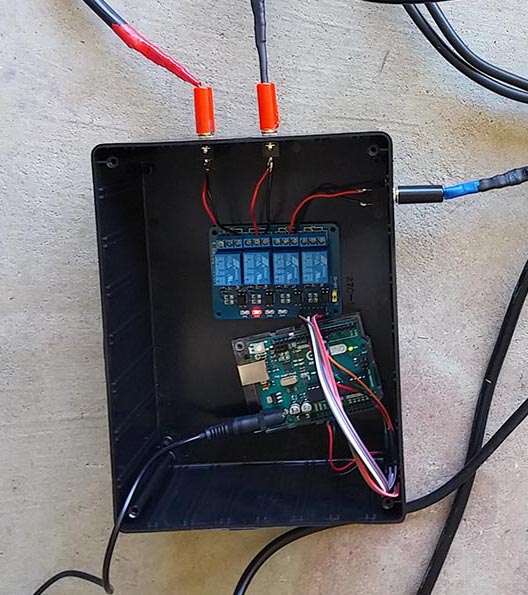
I have a 4th relay on the block but am not currently using it. Red light comes on when that relay is active. In this pic it was #2.
Remember these are all just on the control side of things so it’s much lower voltage. The power being supplied to the fog machines is still coming from your standard 110/120 plug.
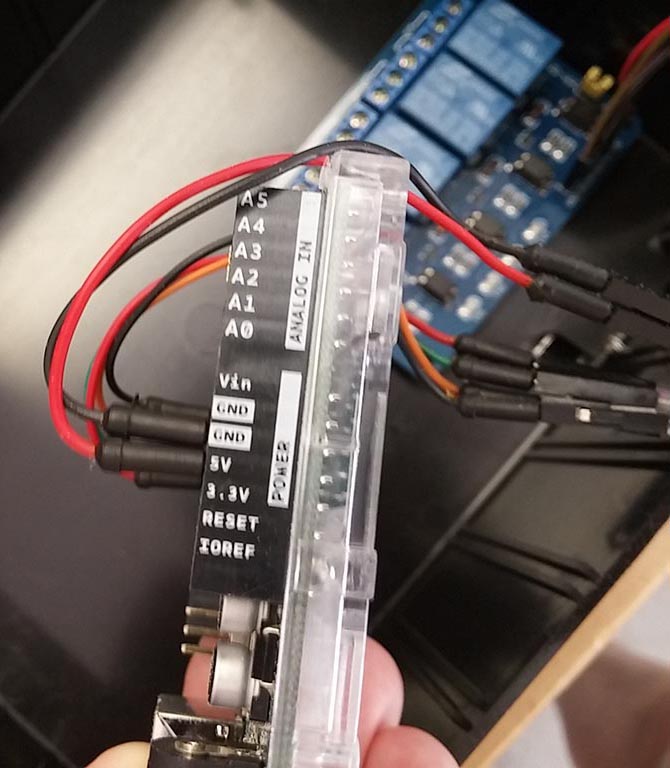
Power (and ground) for the relays coming from the 5V on the Arduino (this does NOT power the foggers – they still plug into the wall like normal). Arduino has its own plug via USB.
So we are basically sending an “ON” message to Pin 7 to control fogger 1, then an “ON” message to pin 8 to control fogger 2…. etc. These 3 pins plug into your relay board and switch it on and off.
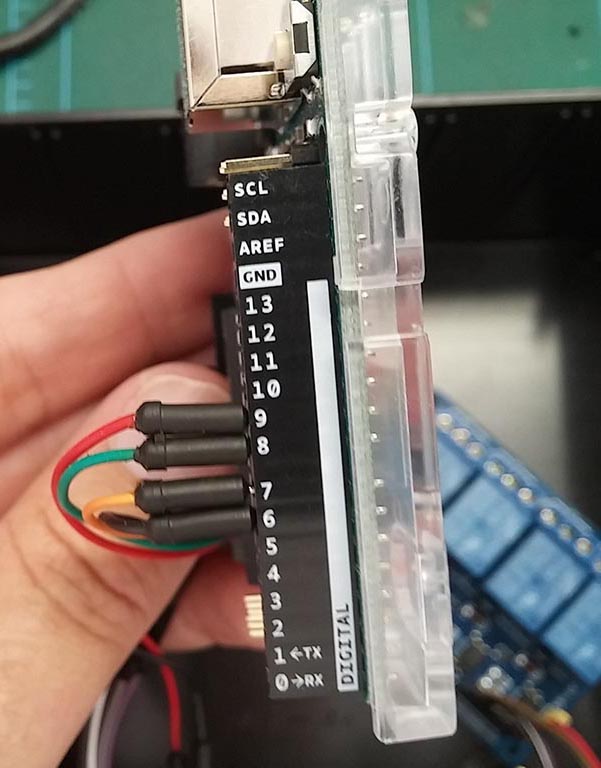
You’ll see in the code that Pins 6,7,8 and 9 control the relays.
This is the basic construction and all the components you’ll need. Coming in the next post – the Arduino code!